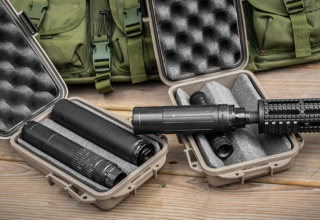
Transform the function, feel, and look of your shotgun with the Woox Gladiatore furniture upgrade kit
by Rob Reaser
Firearm owners often fall into one of two camps. One sees their guns simply as tools, where function and utility are the benchmarks and aesthetics are not even up for consideration. The other understands that performance results are what matters most in a firearm, yet style and craftsmanship are integral to appreciating and enjoying their guns.
For centuries, high style and expert craftsmanship have stood as the hallmarks of quality firearms, with much value being placed on exquisite metal work and elegant wood furniture. Unfortunately, we all can’t afford to step into the realm of Old-World bespoke firearms. But we can come a bit closer with the transformative offerings from a company called Woox.
Woox is a brand based in Hickory, North Carolina. Its parent company, Minelli Group, goes back to 1937 Italy, when the Minelli family set up a concern to log timber in a northern alpine valley and eventually began a custom woodworking enterprise. Today, the Woox brand specializes in producing high-end wood products for the outdoor enthusiast market, which includes premium-grade wood stocks and grips for modern firearms.

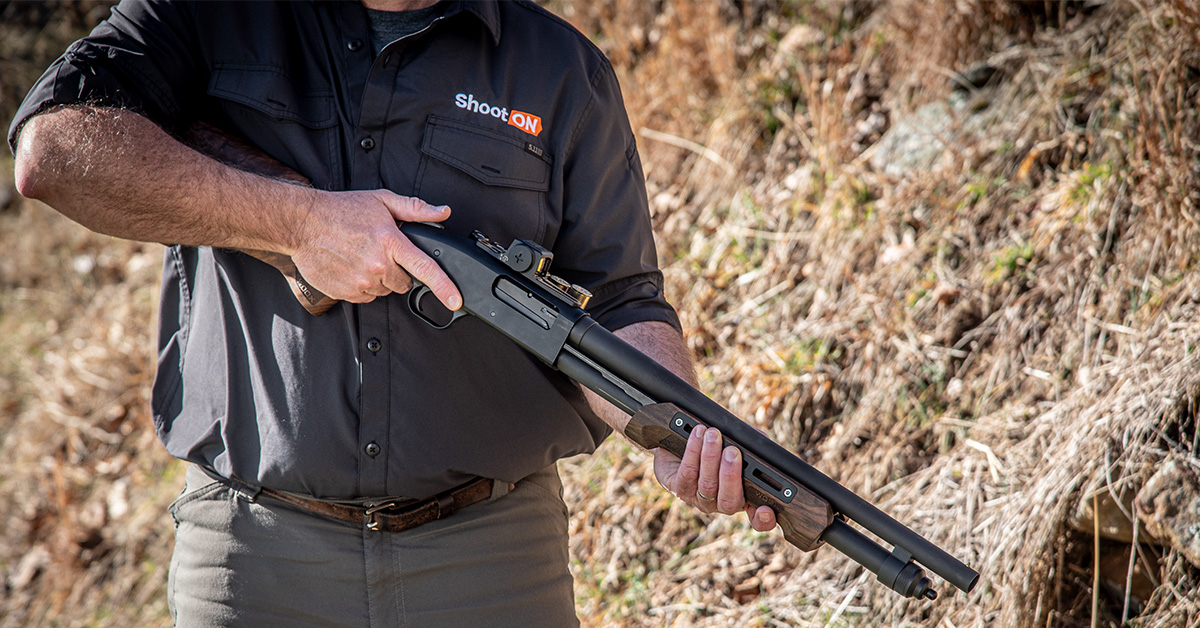
Having cast my eyes on the Woox portfolio, I settled on the company’s Gladiatore furniture kit — part of the company’s new High Grade Series of stock kits — as an upgrade for a Mossberg 590 defensive shotgun.
Why a defensive shotgun for such beautiful furniture? The elegance of the Woox forend and buttstock are a given, but I was curious to see if what most would consider to be an aesthetic upgrade might also deliver a valid performance enhancement over the factory polymer set. As with any defensive shotgun, I also wanted to install Mesa Tactical’s 6-round SureShell Side Mount Carrier and top it all off with a Vortex Viper Shotgun Enclosed Micro Red Dot. The side mount requires disassembly of the receiver, so the Woox Gladiatore installation proved the perfect opportunity to do all the work at once.
As you’ll see, this shotgun makeover is a straightforward DIY project anyone can do.
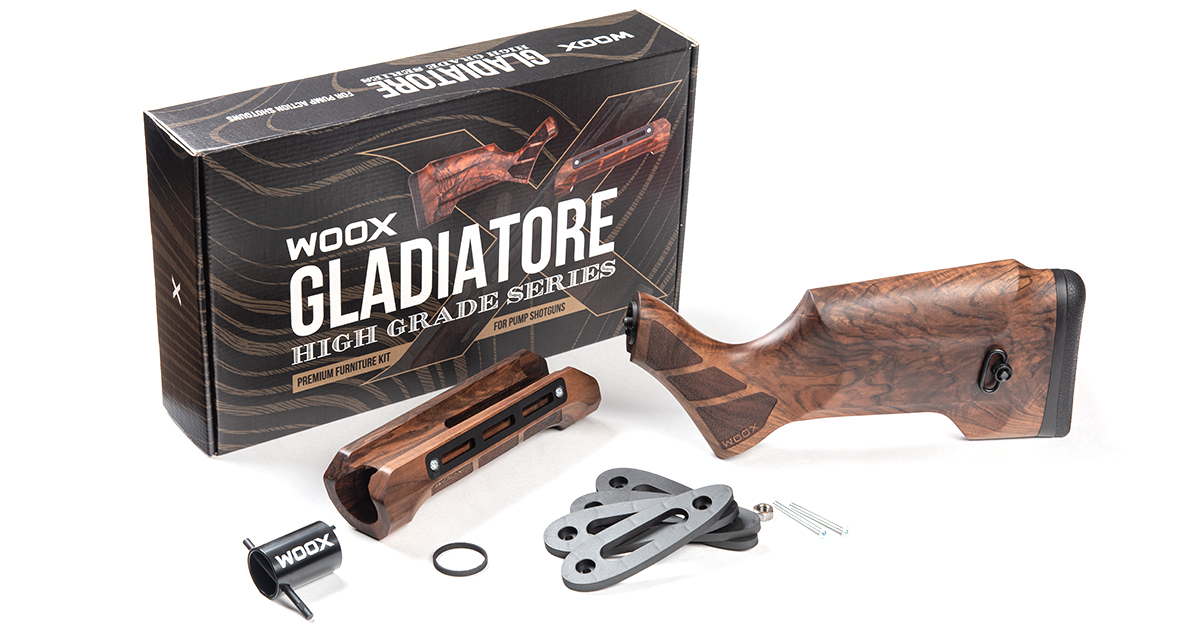
Woox offers furniture kits for a broad spectrum of long guns. The Mossberg pump shotgun Gladiatore kit is available for the 88, 500, and 590 models. It includes the high-end American walnut buttstock and forend pieces, recoil pad spacers for custom adjustment of the length-of-pull, and a wrench to remove and install the action slide nut.
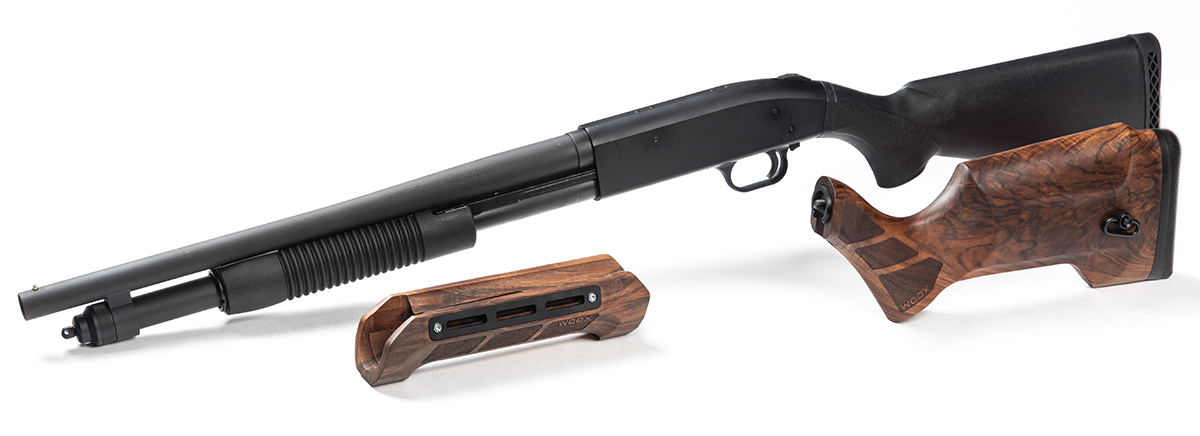
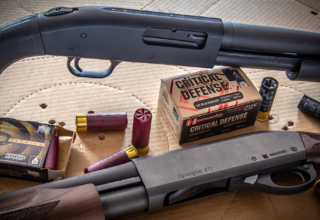
Polymer furniture, as seen on the factory-original 590 above, serves its purpose. It keeps manufacturing costs down, and you can beat the snot out of it without worry. It also looks…bleh. The Gladiatore is going to change the character of this defensive gun bigly and hopefully deliver some welcome performance enhancements.
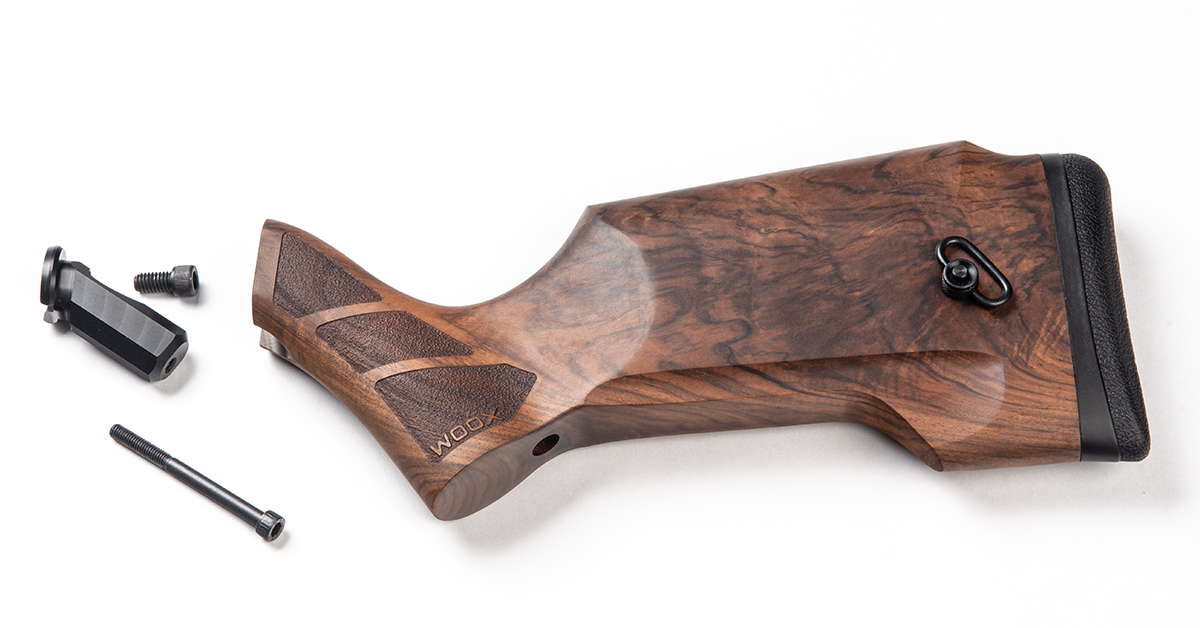
The buttstock comes with all required installation parts. A machined aluminum coupling provides the interface between the receiver and the stock. The stock is secured with a long hex head screw that runs through the grip.
Woox provides a quick-detach sling swivel cup and swivel mounted in the left side of the stock. Later this year, Woox will be offering this option on the right side of the stock as well, which will facilitate cross-body carry for defensive shotgun use.
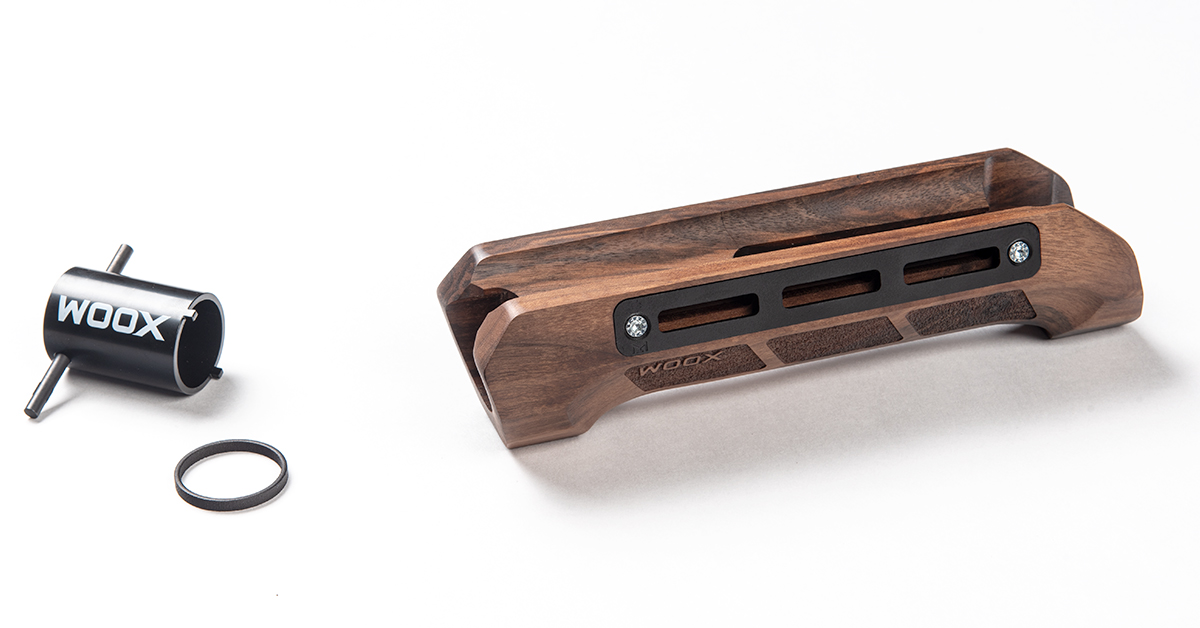
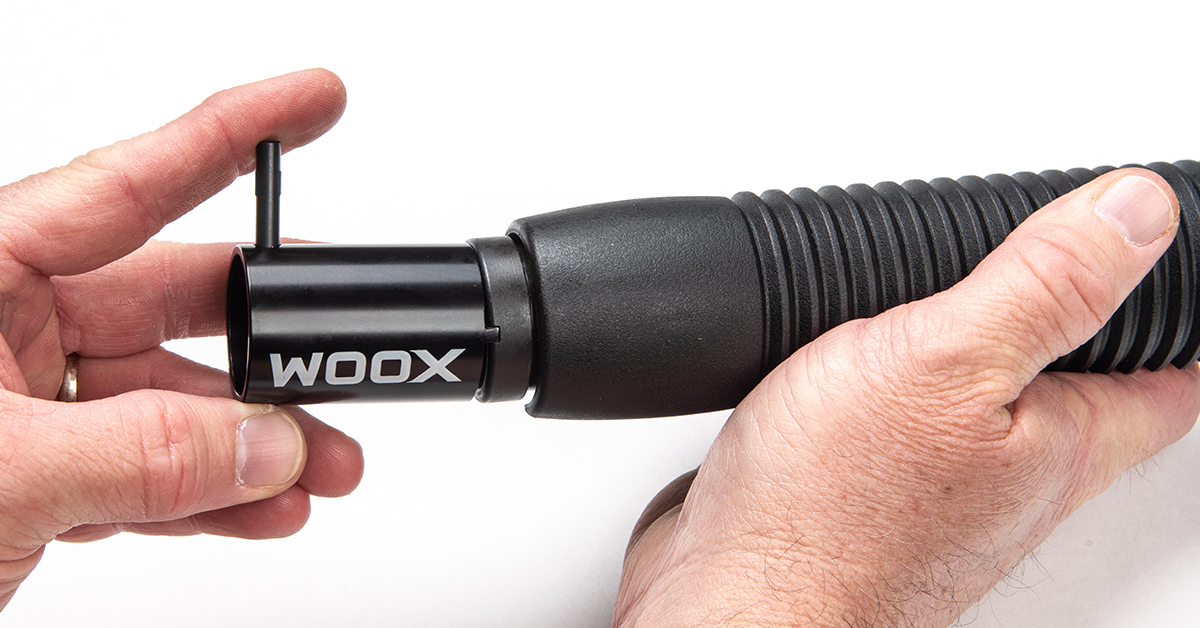
The forend piece is precision-machined to fit the Mossberg magazine tube. Three M-LOK slots found on both sides of the forend allow for accessory attachment. The kit also includes a spacer that goes between the forend and the action slide nut in case you need to eliminate any fore/aft movement of the forend. Also included is an action slide nut wrench, which is required for the nut removal and installation.
Forend Installation

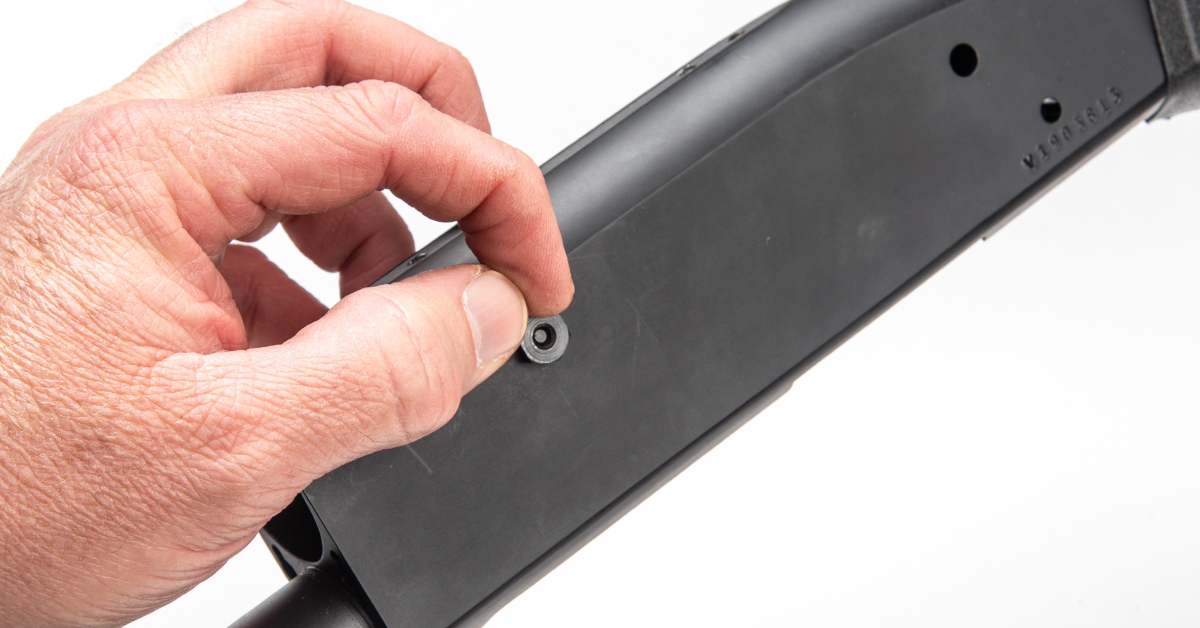
Begin by ensuring the shotgun is clear of all ammunition — no shotshells in the chamber, in the receiver, or in the magazine tube. With the gun rendered clear of ammunition and the safety selector at the safe position, remove the magazine cap.
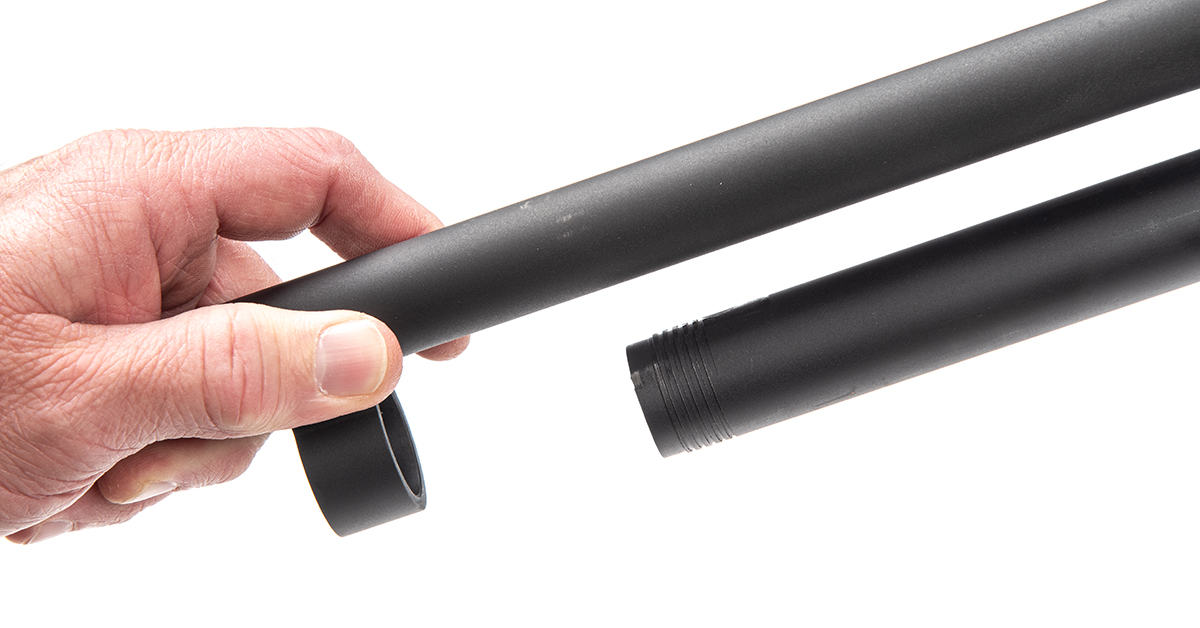
Slide the action rearward until the bolt face is in the center of the ejection port and pull the barrel off the magazine tube and out of the receiver.
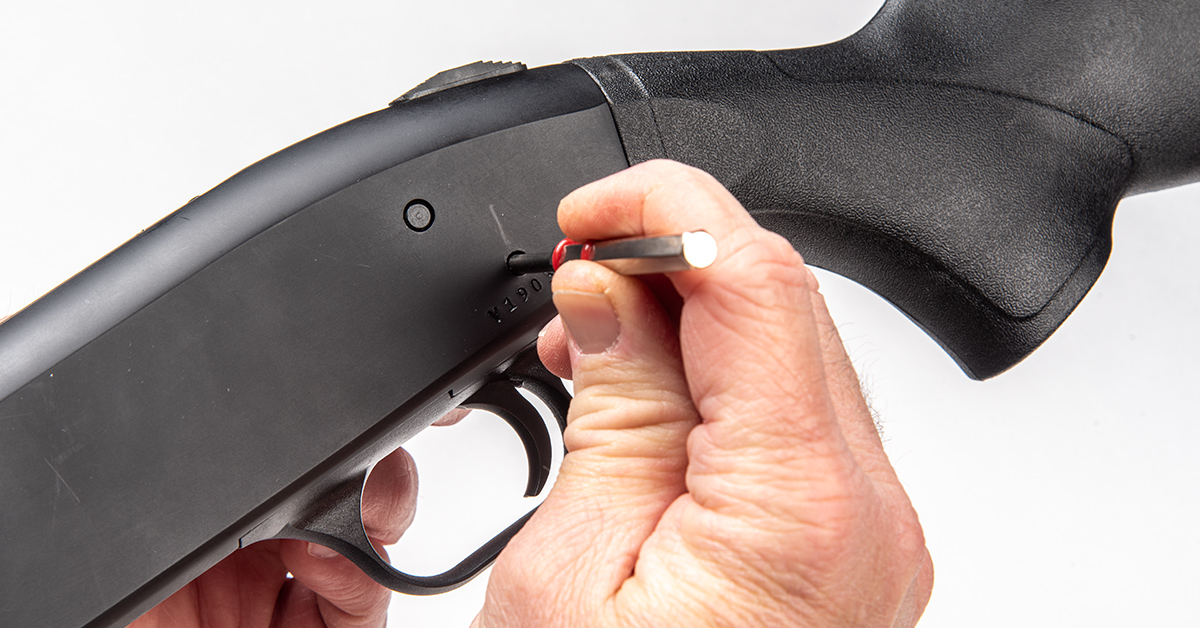
For Mossberg 500 and 590 applications, the action slide must be removed to gain access to the action slide nut. This requires removal of several components from the receiver. Start by pushing out the trigger assembly retaining pin with a flat punch. Push on the pin from left to right, as shown.
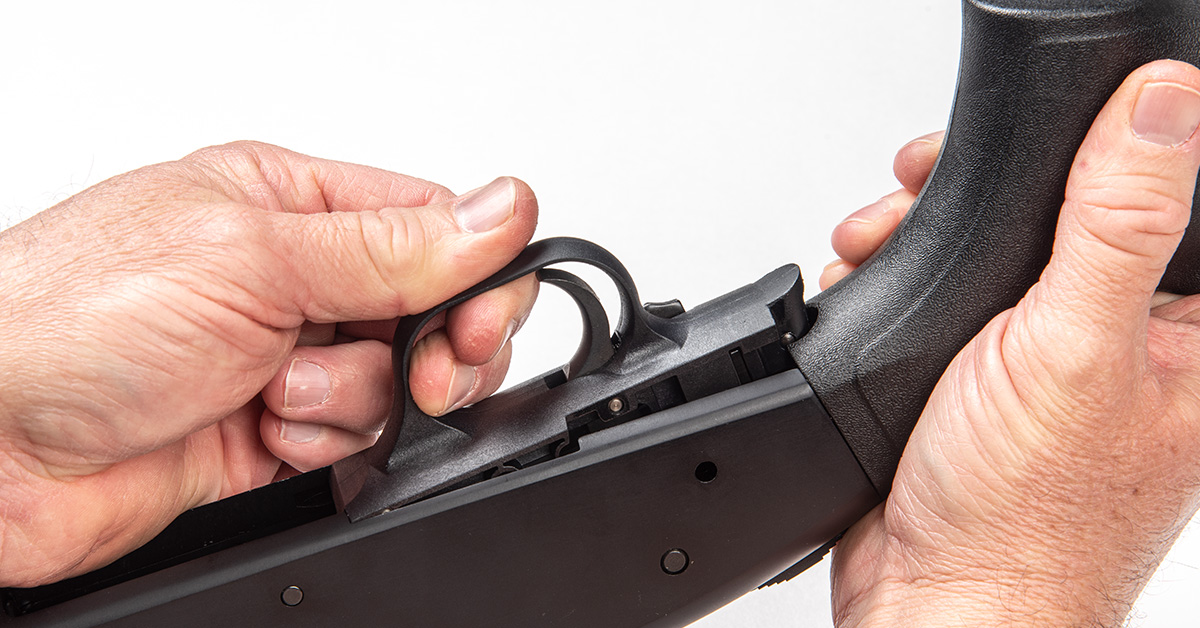
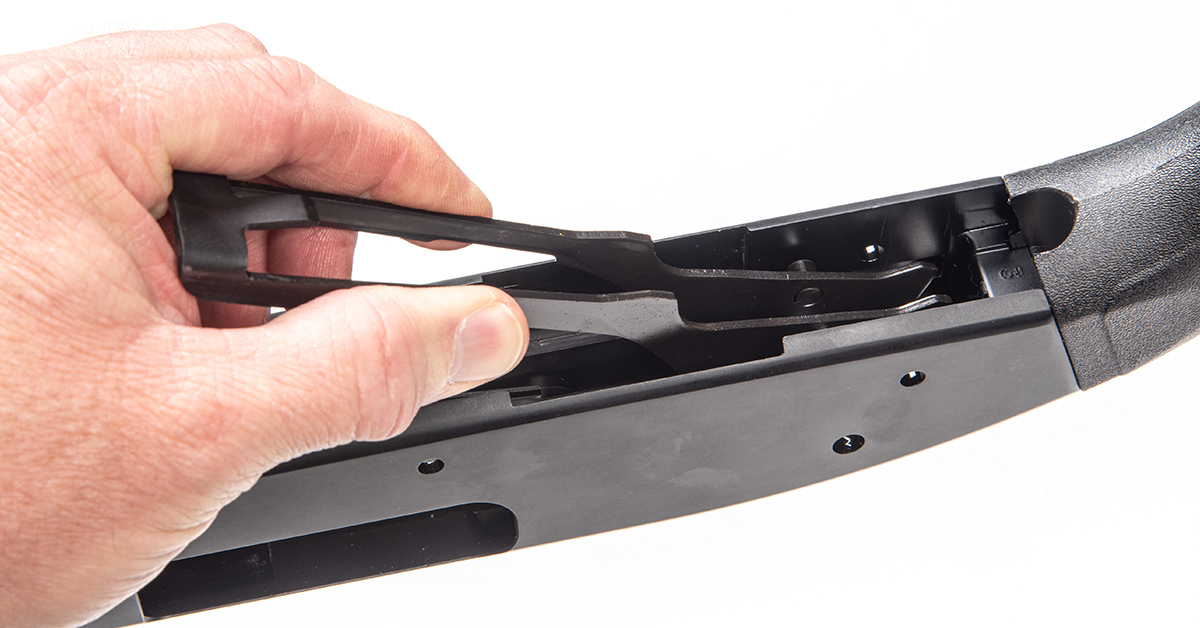
Turn the gun over and lift the trigger assembly out of the bottom of the receiver. Lift the rear of the receiver first and then pull up on the assembly to remove it from the receiver.
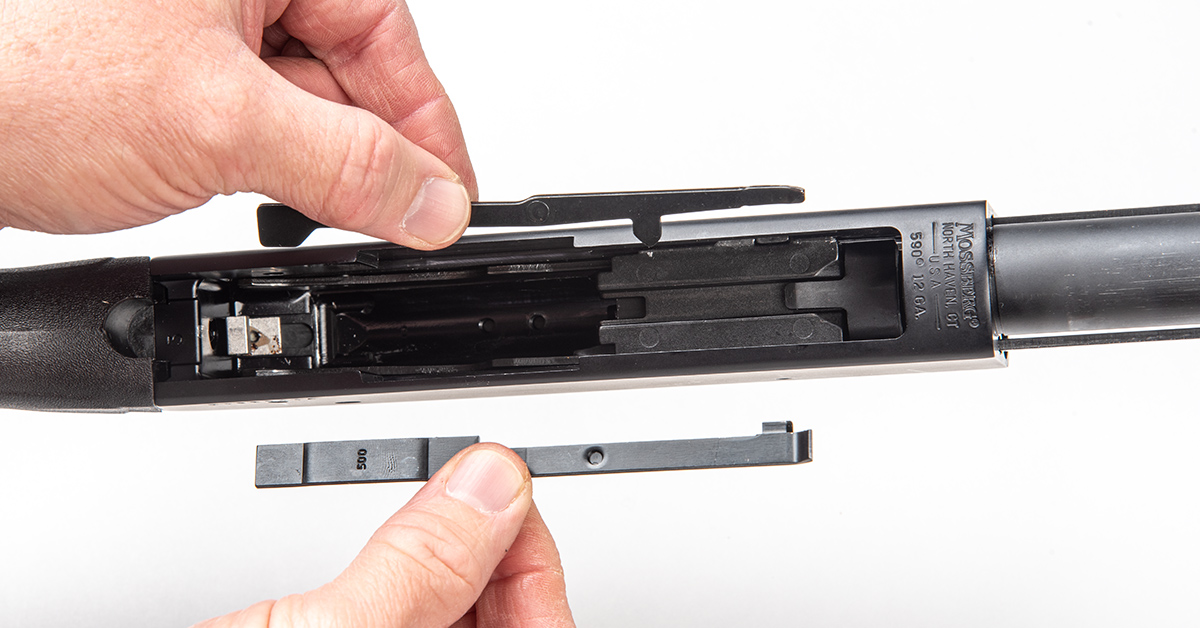
If they haven’t already fallen out, remove the cartridge stop and the cartridge interrupter. These can only go back in one way, so don’t worry if you forget which part goes where.
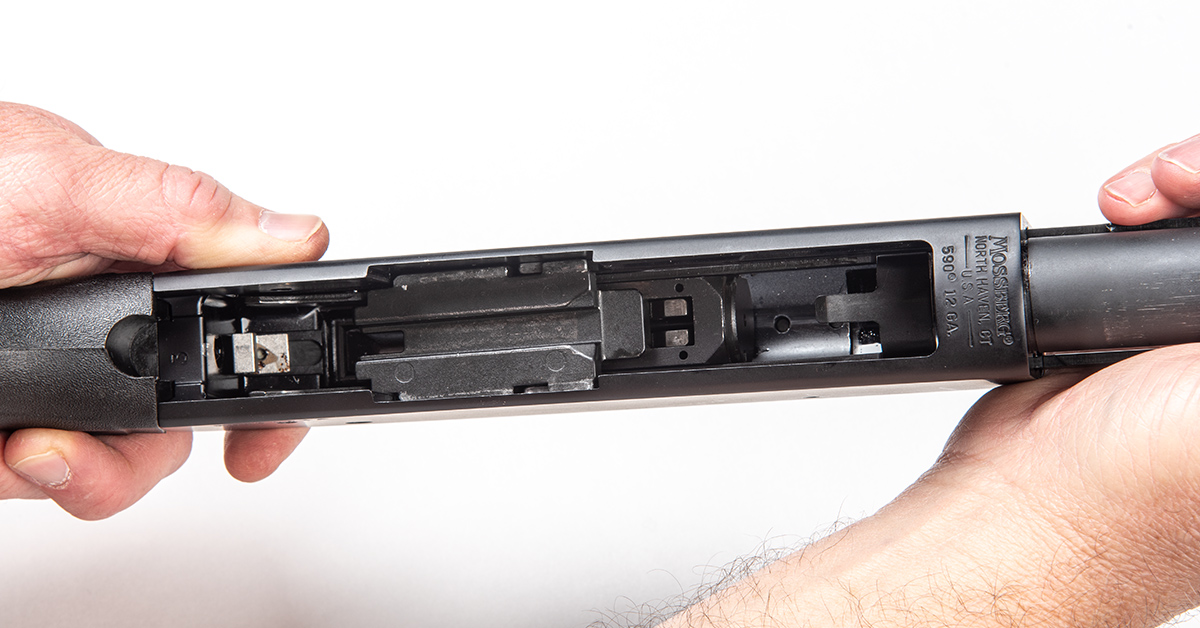
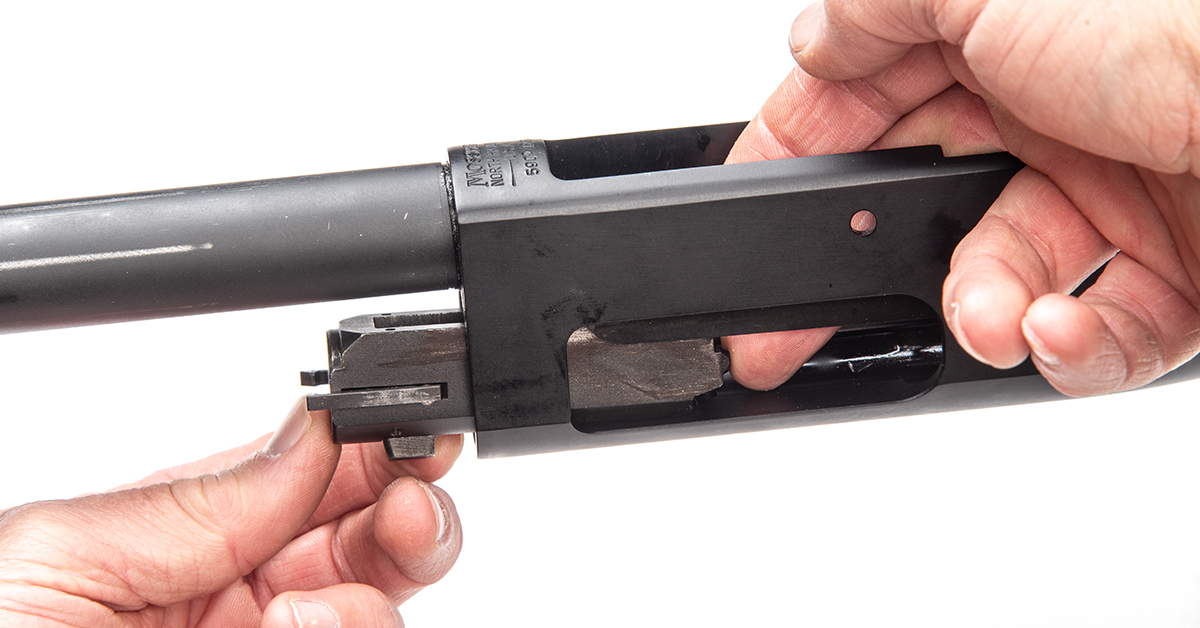
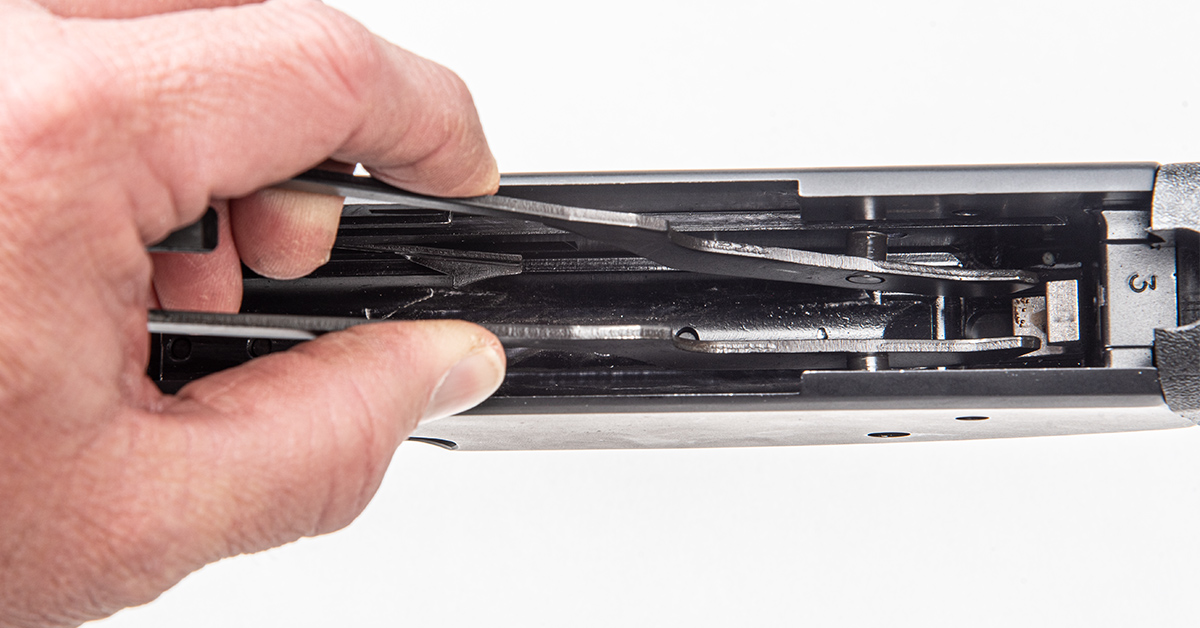
Pull back on the forend until the bolt slide is aligned with the cutout in the receiver, as shown.
Lift the bolt slide out of the receiver.
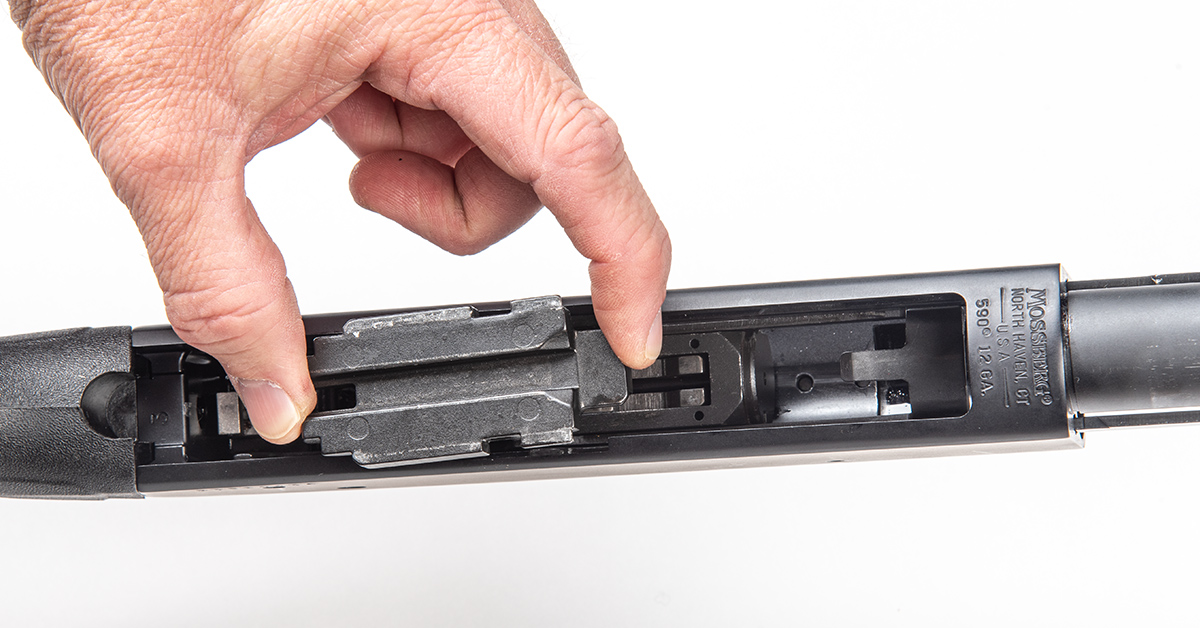
Pull the action slide assembly out of the receiver and off the magazine tube.
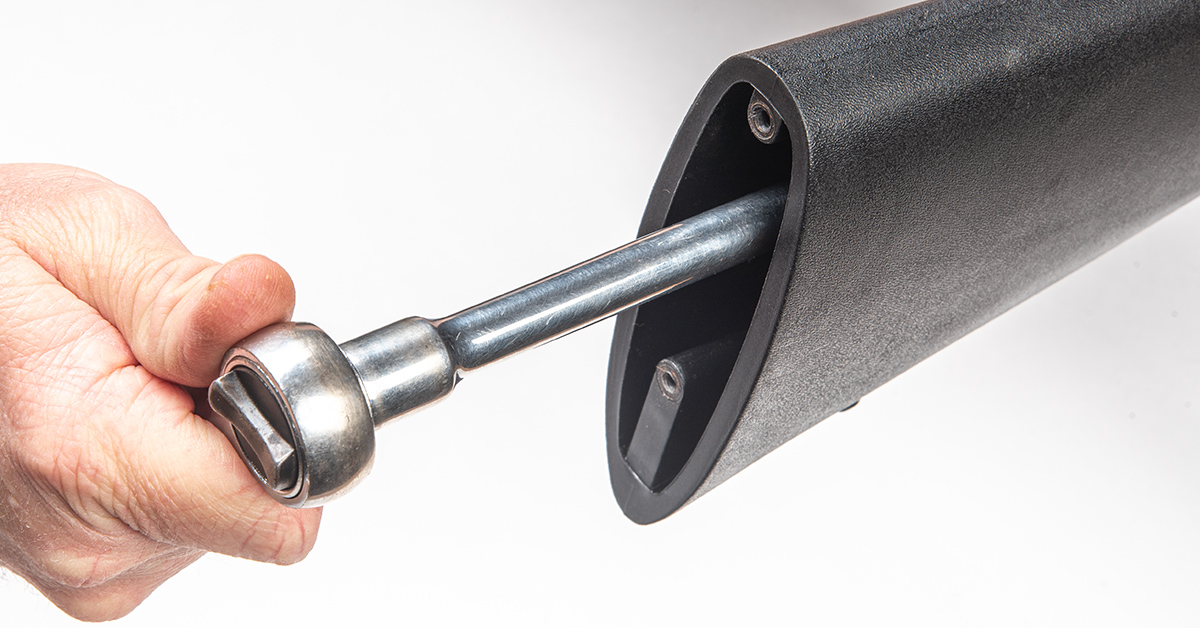
Use the supplied wrench to unscrew the action slide nut from the slide. This is a fine-thread nut, so it will take several revolutions before it comes off.
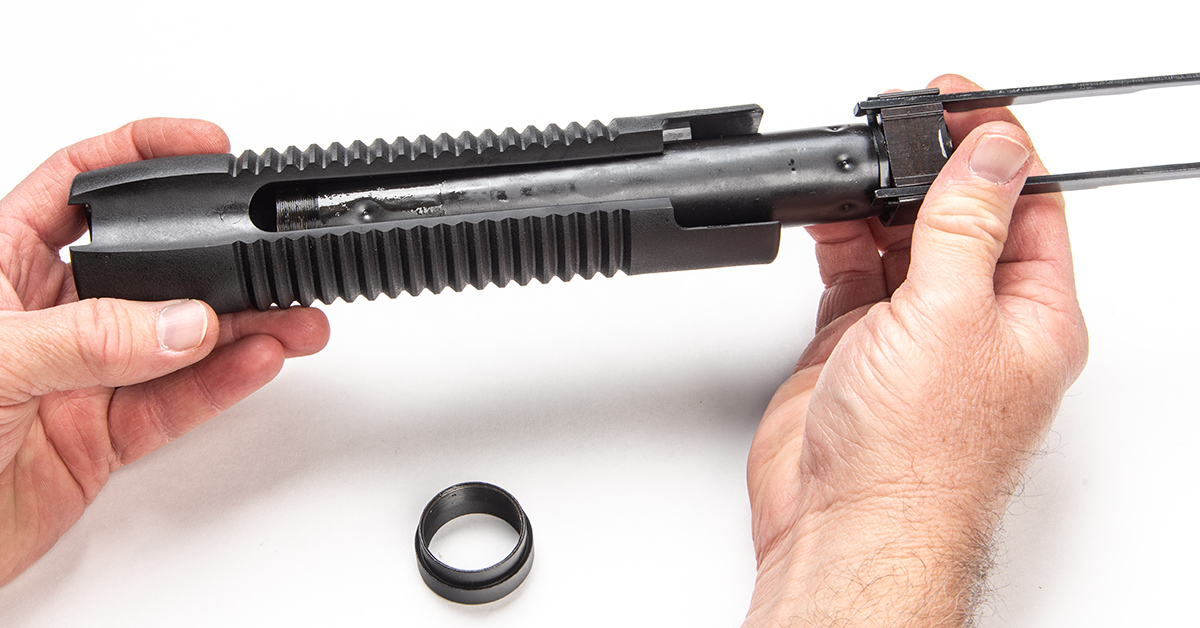
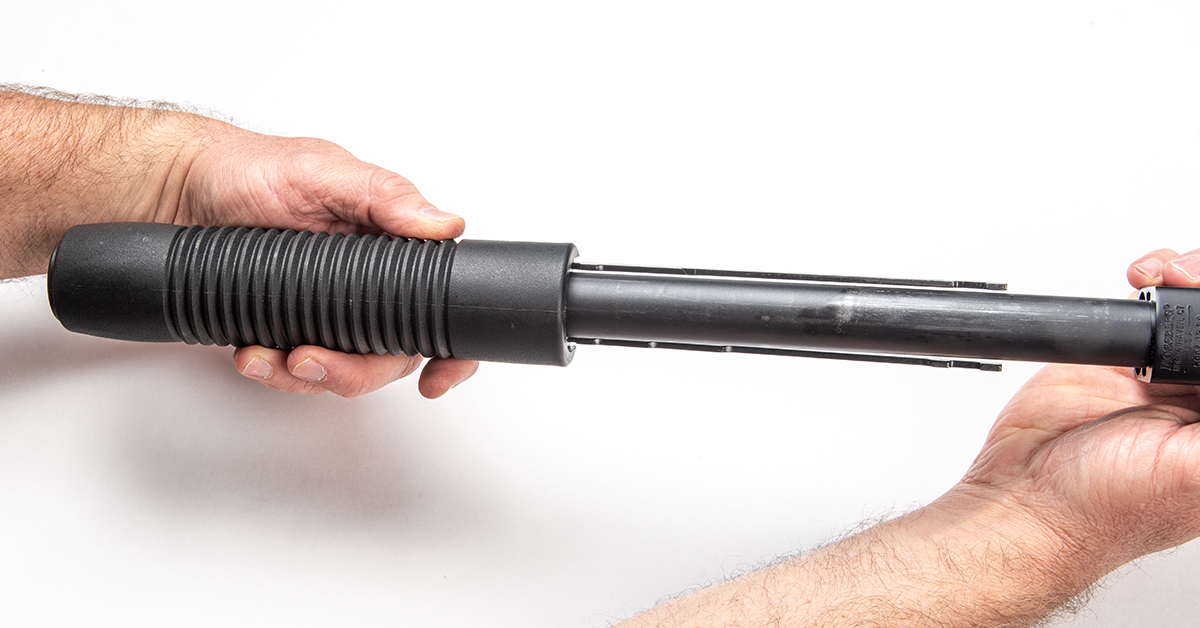
Once the nut is removed, slide the forend off the slide.
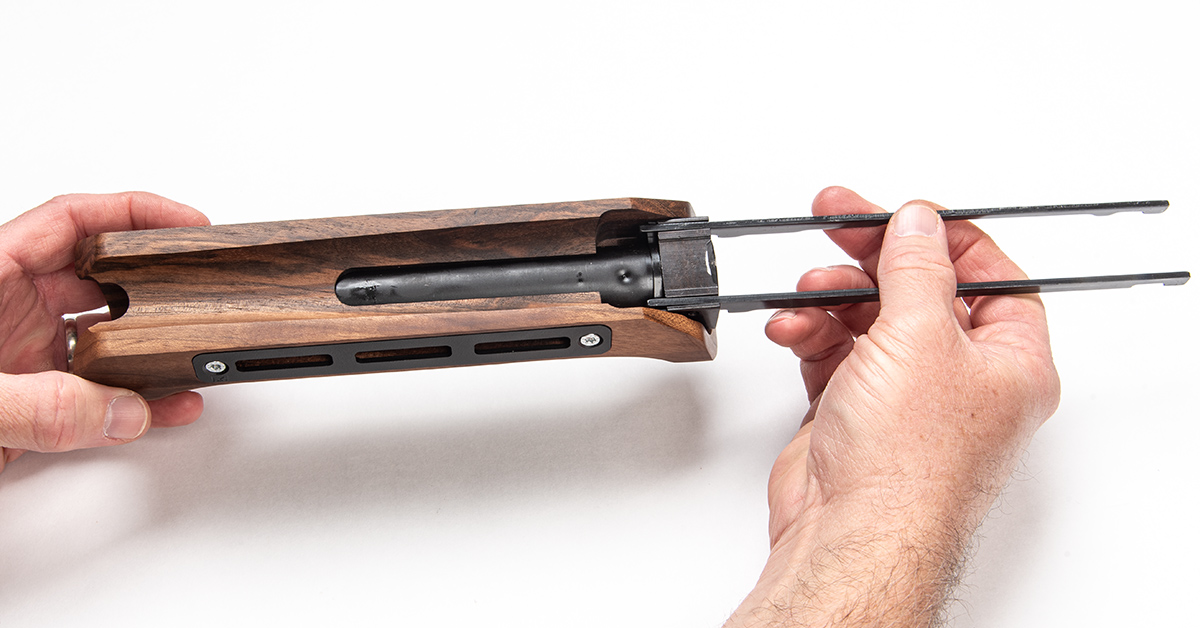
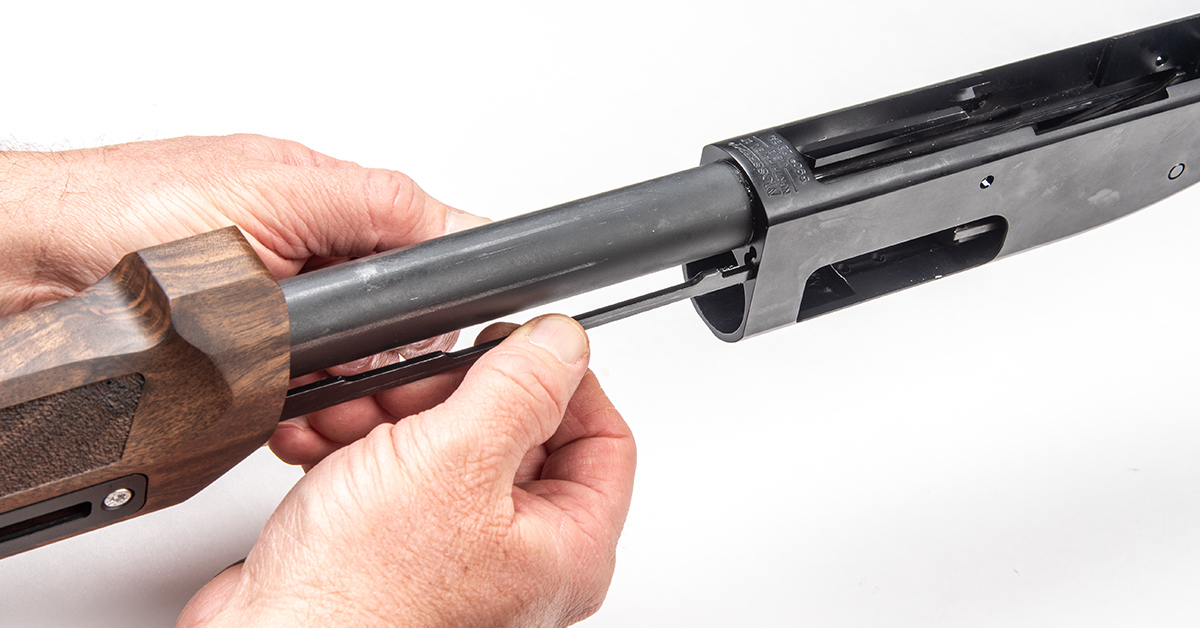
Installation of the new Gladiatore forend is simply the reverse of the disassembly. Slide the action into the rear of the forend until it is fully seated. Note that the action bars are oriented up.
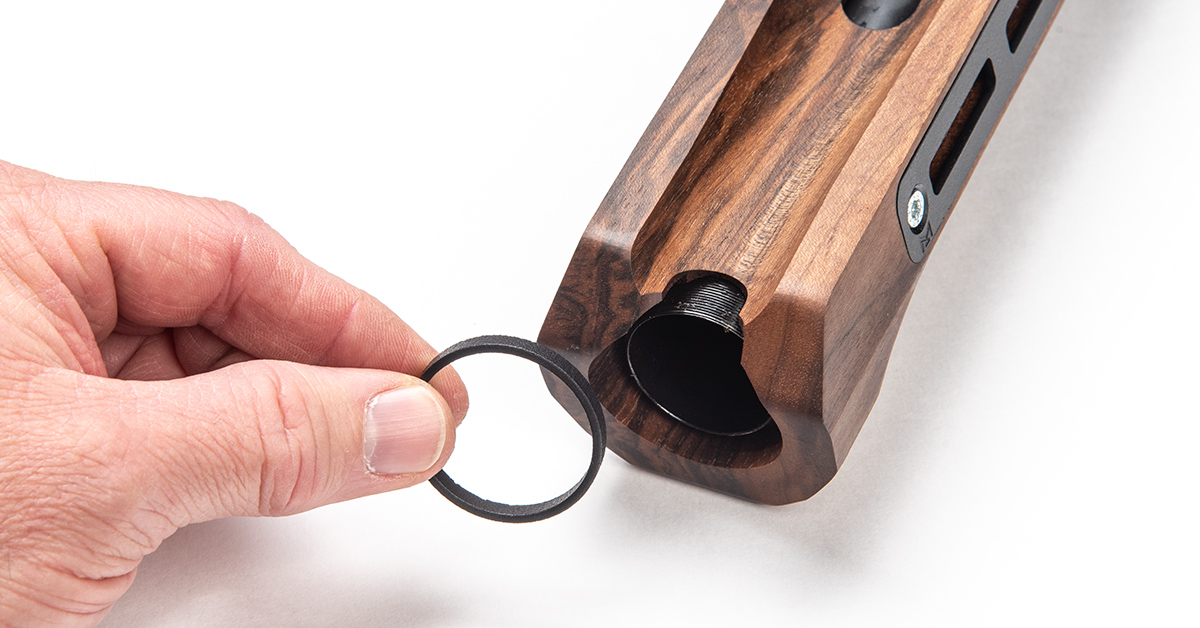
Woox supplies a polymer spacer with the kit. This part may or may not be required to ensure there is no loose fore/aft movement of the forend once it is installed. You won’t know until you install the action slide nut. This 590 ended up needing the spacer installed.
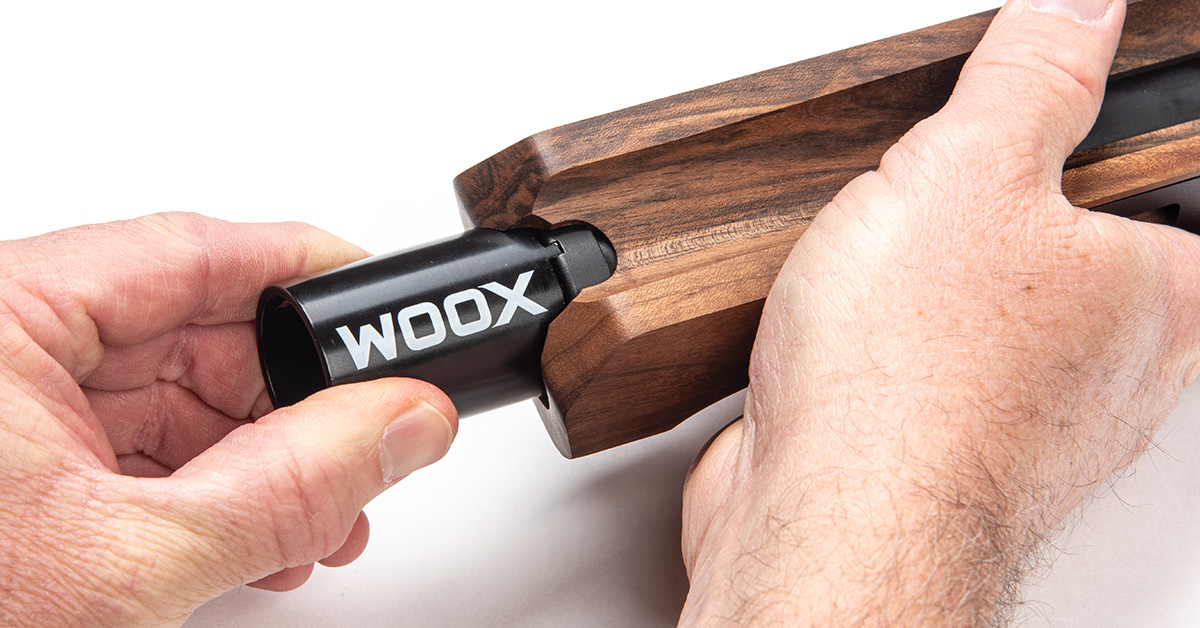
Again, use the Woox nut wrench to install the action slide nut. Firmly seat the nut, but don’t excessively tighten it. Check for front and back play in the forend. If it is loose, install the polymer spacer.
Shotshell Carrier Installation
Before reinstalling the action slide assembly, I wanted to install the Mesa Tactical SureShell Side Mount Carrier. This requires full access to the receiver interior. If you do not plan to do this installation, you can skip ahead to the forend installation section below.
Remove the bolt assembly from the receiver by pushing it forward through the front of the receiver.
Lift and squeeze the shell lifter arms to remove it from the receiver.
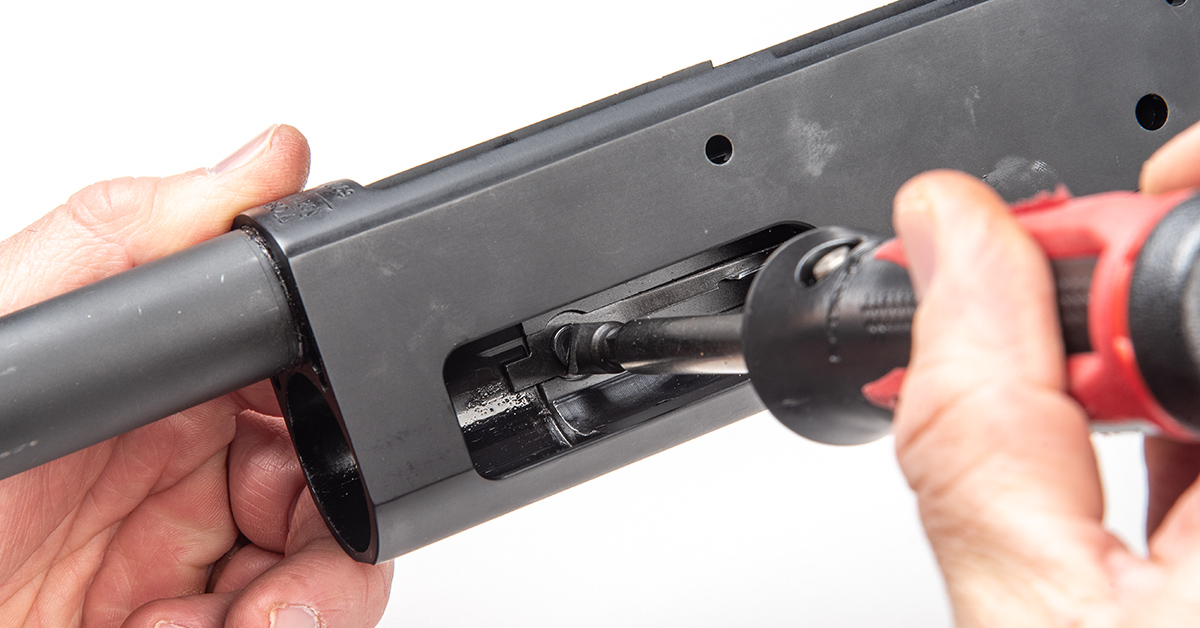
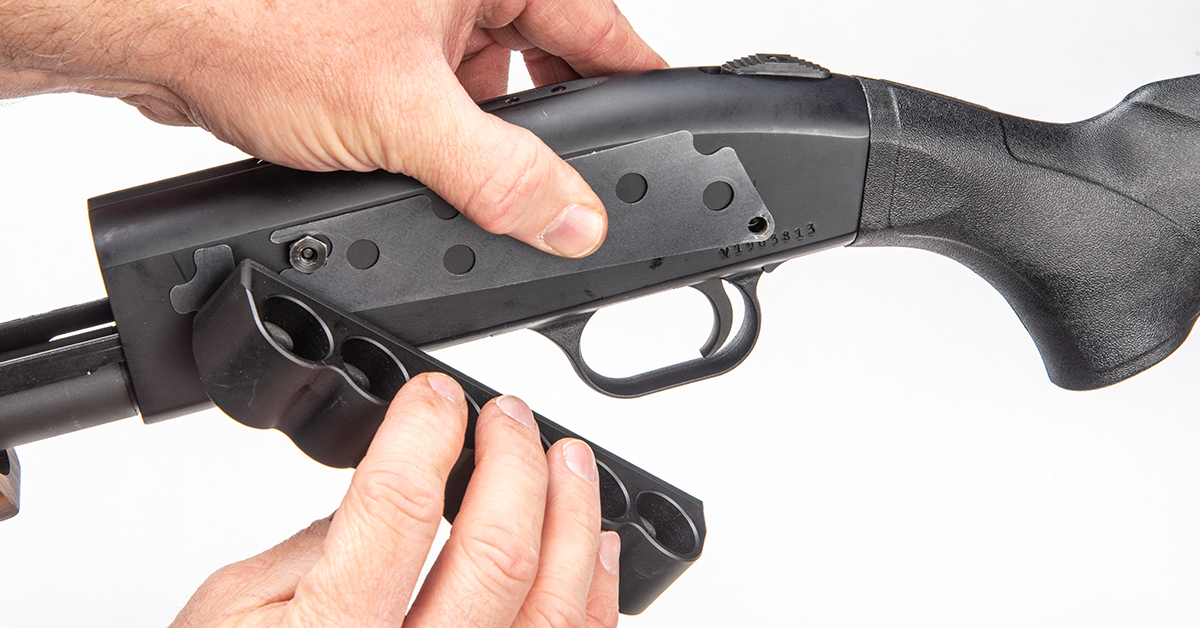
The SureShell system anchors the front of the carrier via the ejector retaining screw. Remove the screw.
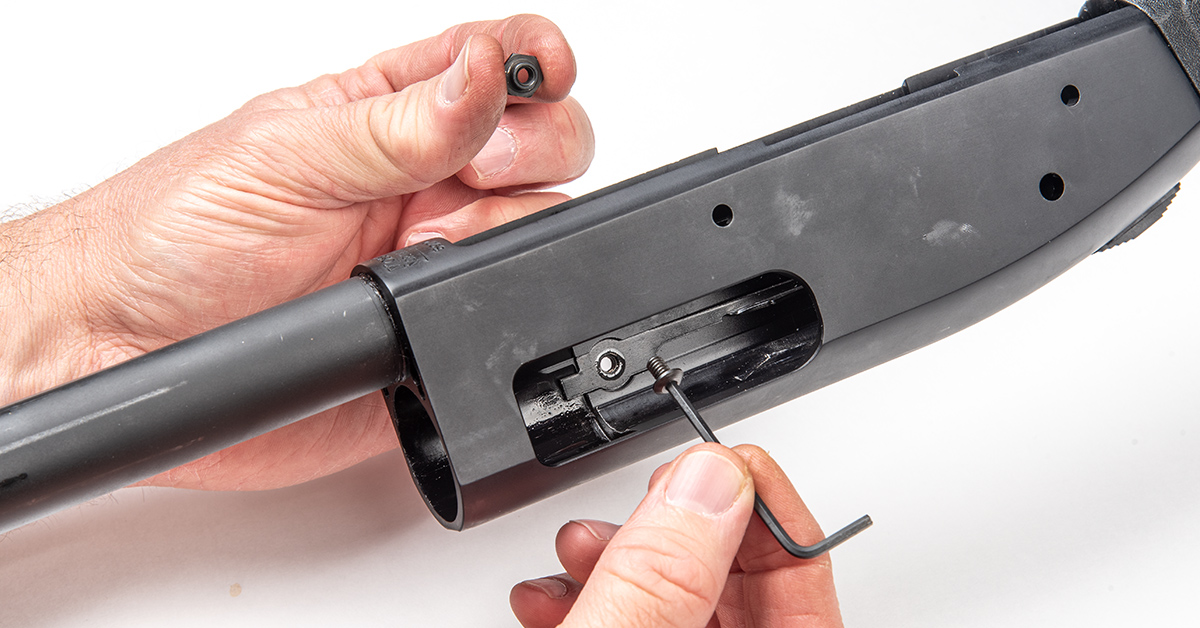
Reposition the ejector (if it fell out of position) and secure with the supplied screw. The nut will go onto the screw from the left side of the receiver.
Loosely install the carrier nut onto the new ejector retaining screw.
Reinstall the shotshell lifter into the receiver. Again, squeeze the arms together until the left and right bosses slip into their respective slots.
Reinstall the action slide onto the magazine tube and into the receiver. You will need to push down on the arms in order for them to clear the bolt slide rails.
Reinstall the bolt through the front of the receiver. Be sure to align the bolt’s ejector slot rail with the ejector as you move the bolt into the receiver.
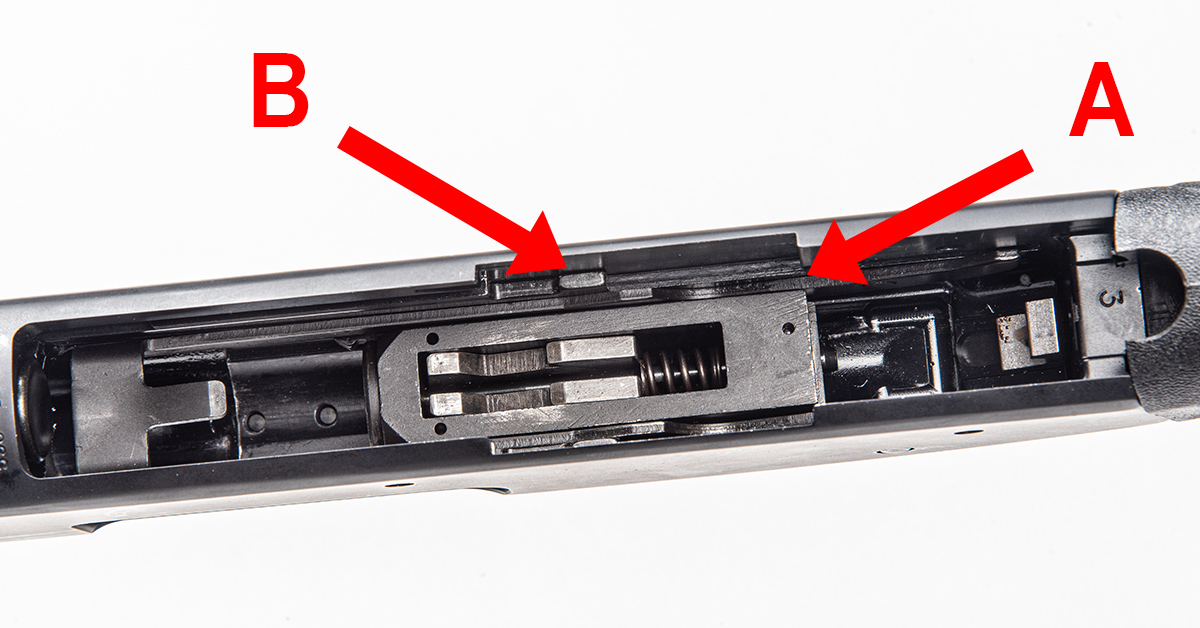
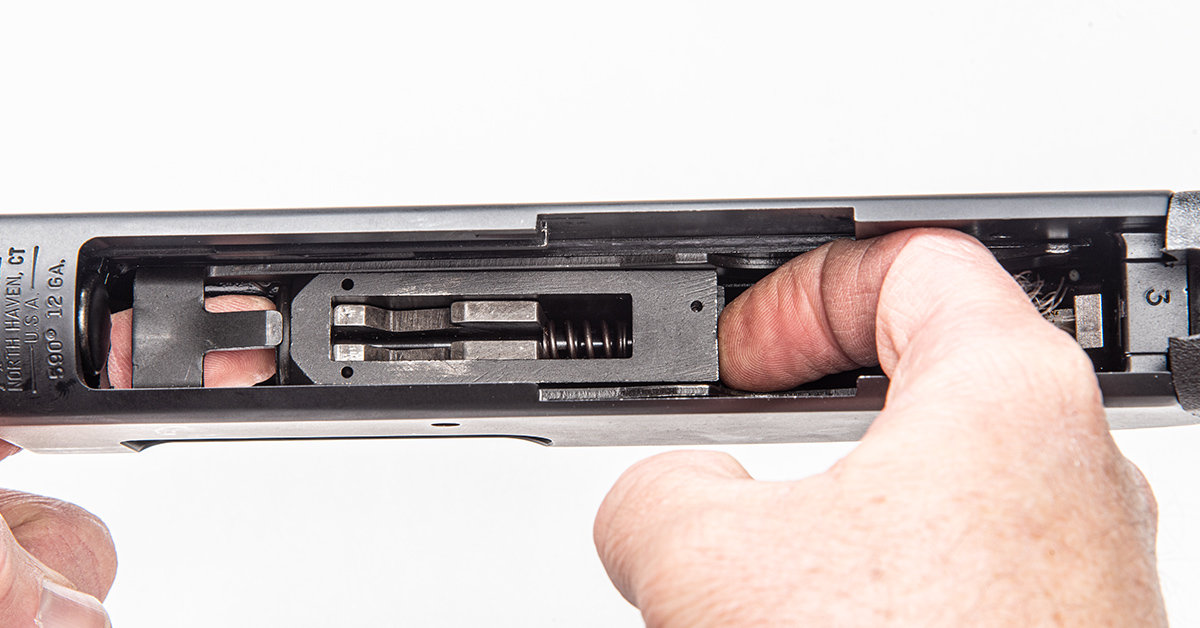
Position the bolt in the receiver with the rear of the bolt aligned with the cutout in the receiver (A). Next, position the action bar slots as shown (B).
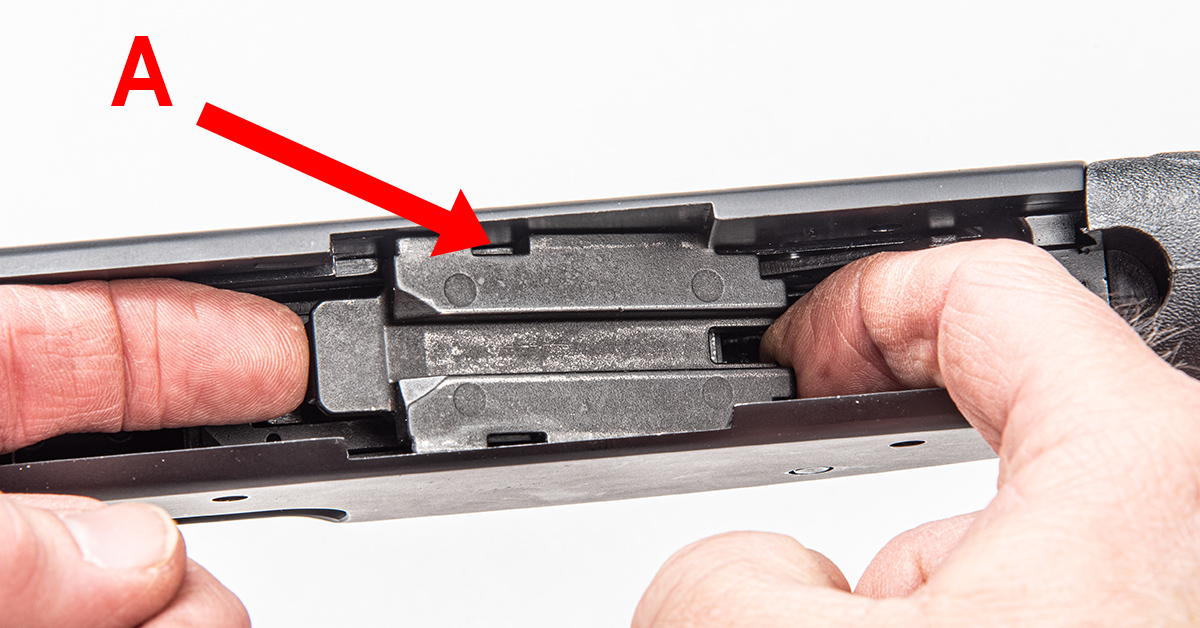
Insert the bolt slide in the receiver with the rear of the slide tilted slightly downward so that it goes under the slide rail. The bolt slide can now drop onto the bottom of the bolt and engage the action bar slots (A).
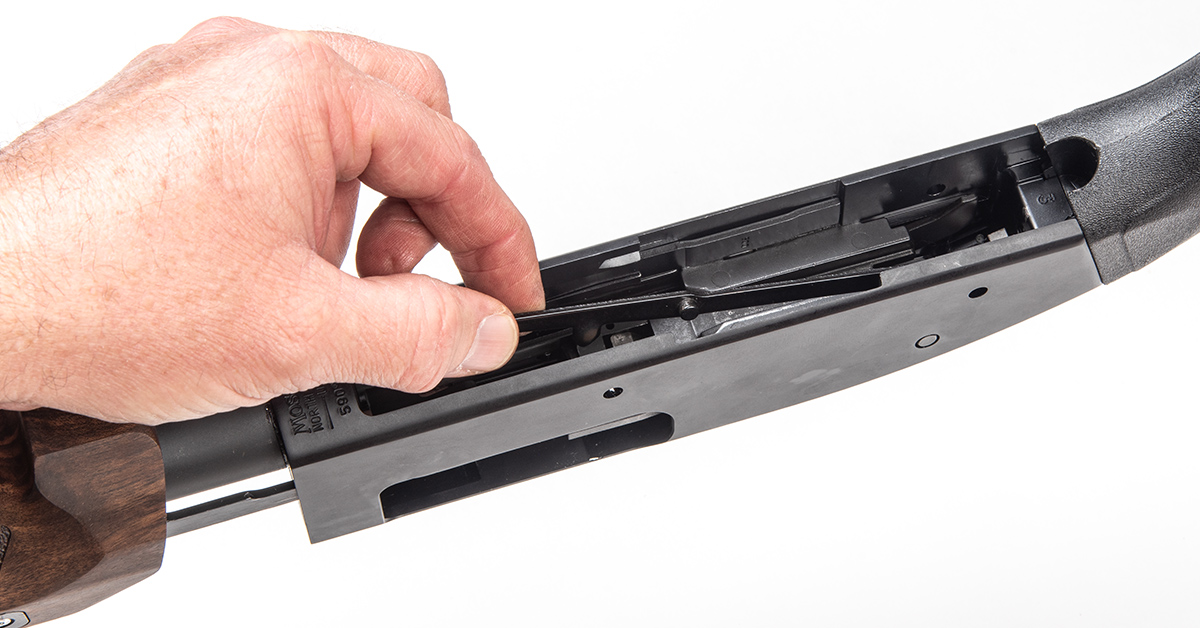
Reinstall the cartridge stop and cartridge interrupter into the receiver. Remember, they can only go into place in one direction — with the curved ends pointed toward the magazine tube. Keep the receiver perfectly upright, as these items can easily fall out of place.
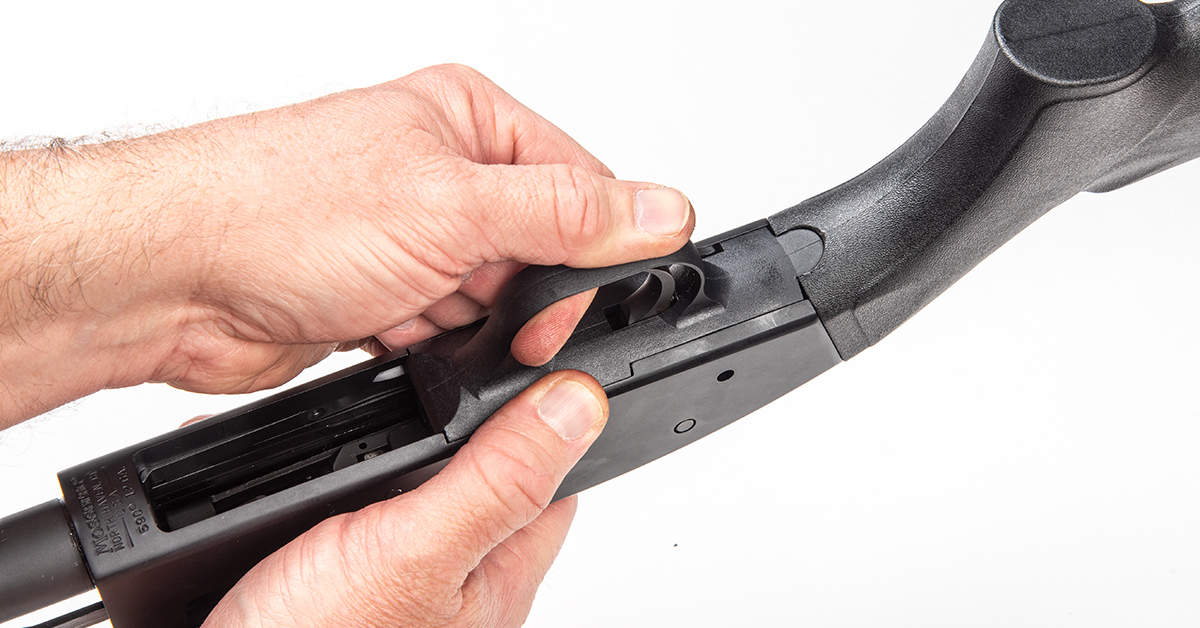
Reinsert the trigger assembly into the receiver. Slide the front end of the assembly beneath the slot in the receiver and push forward to seat it into place. Next, push the rear of the trigger assembly into the receiver. Some pressure may be required to properly seat the assembly, but if it won’t go into place with modest pressure, stop and try again. Excessive force could damage the 500 and 590 polymer trigger housings.
Install the rubber side carrier gasket onto the receiver as shown. Next, install the carrier onto the nut via the carrier keyhole. You will need to adjust the nut until the carrier will just slide over the nut and fully seat into position with modest pressure. If the nut is too loose or too tight, adjust the nut accordingly.
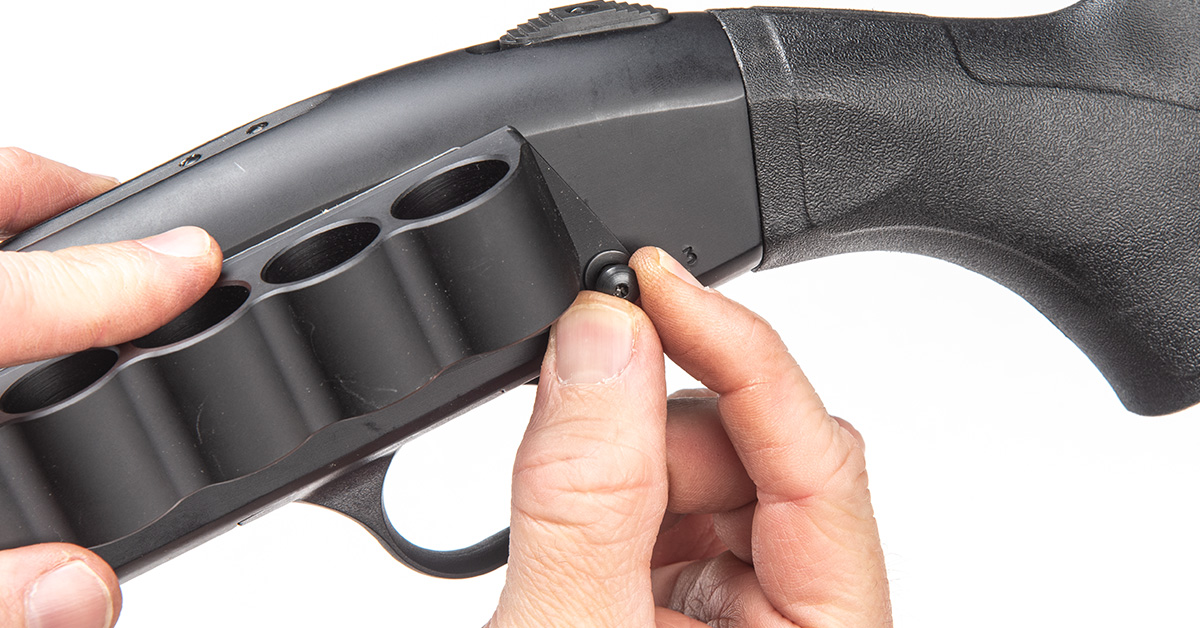
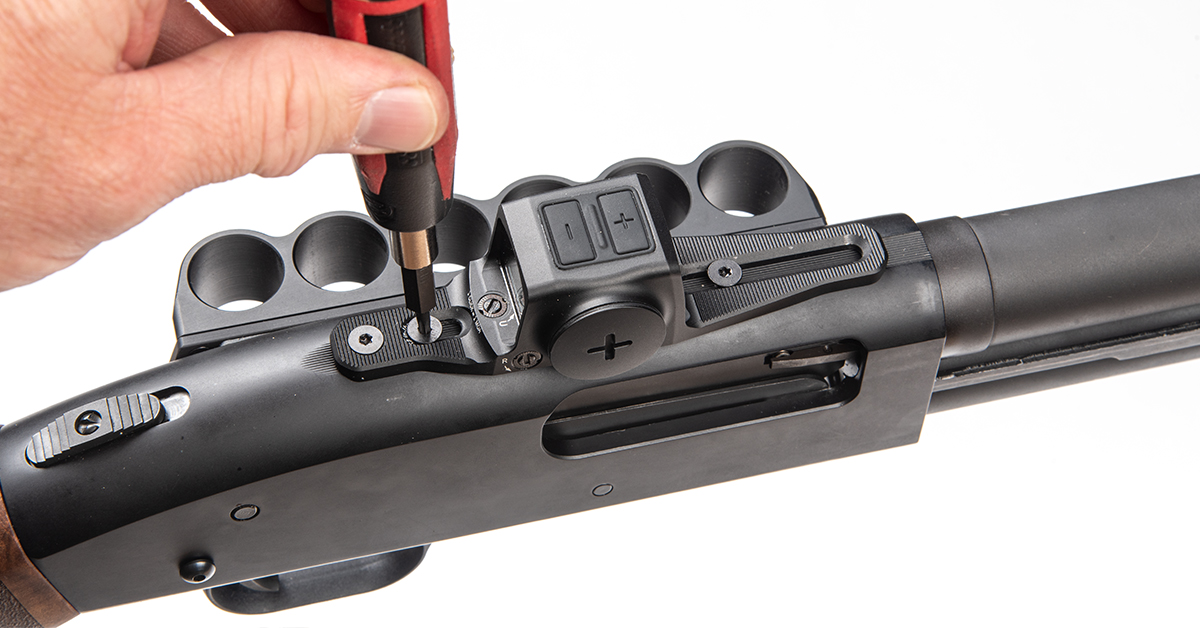
Rotate the carrier until the rear hole aligns with the trigger pin hole. Install one half of the Chicago screw (with washer) through the trigger pin hole.
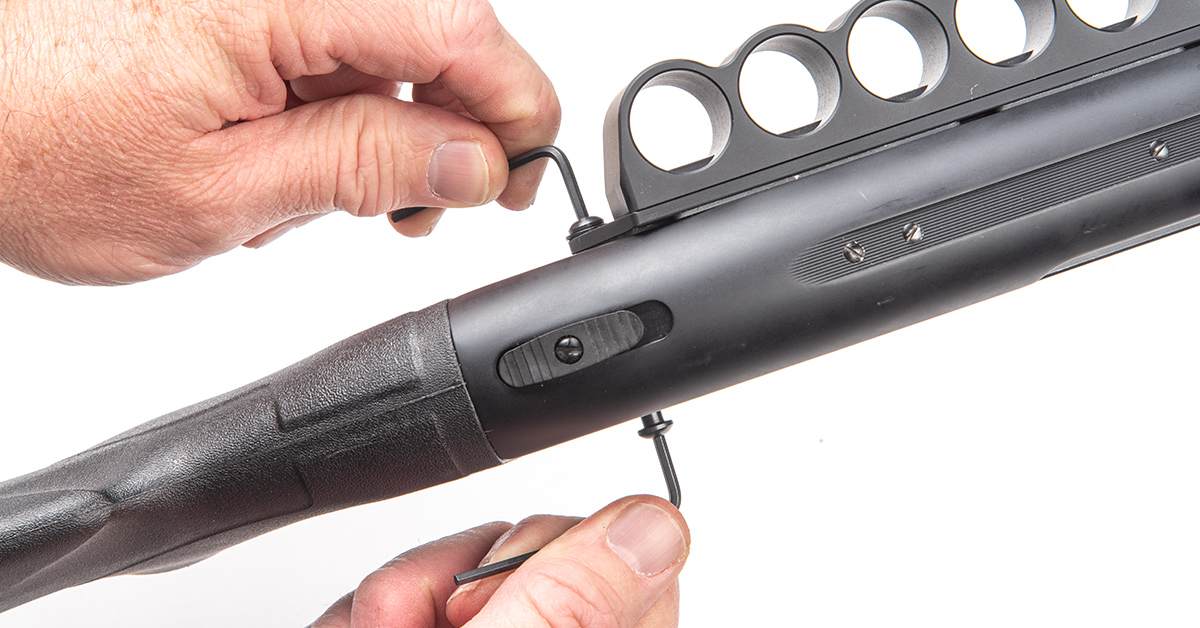
Install the other half of the screw into the right-side trigger pin hole and tighten the two together with the supplied Allen wrenches.
Gladiatore Buttstock Installation
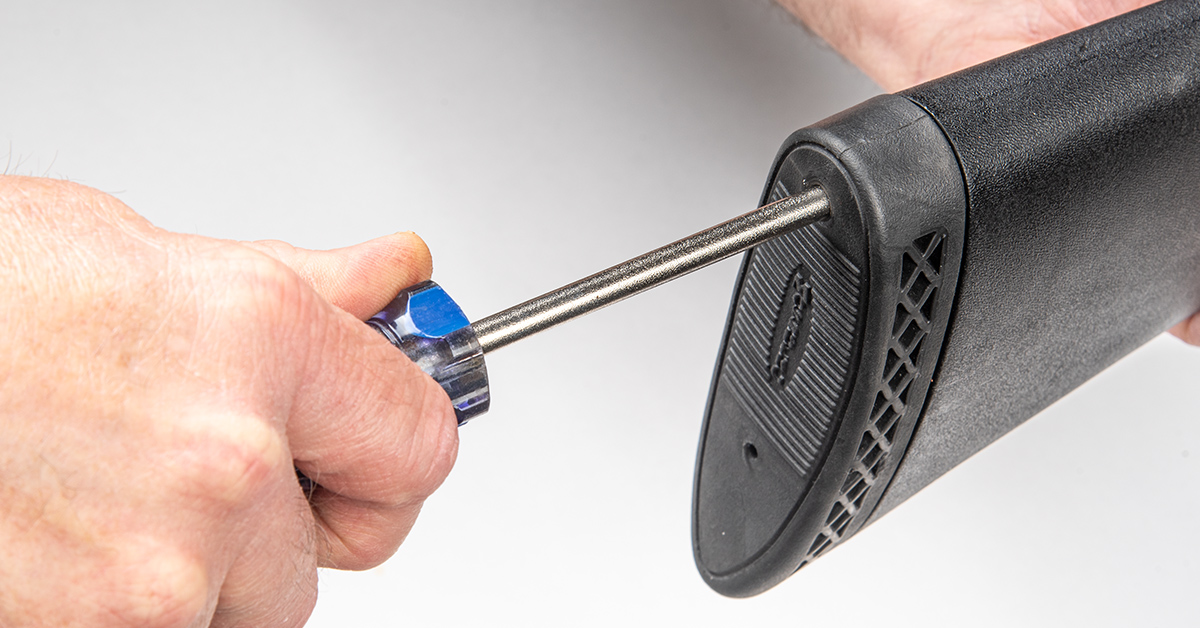
Begin the buttstock replacement by removing the recoil pad with a Philips head screwdriver. Do not use a bit driver for this procedure because the bit will get stuck in the rubber pad. It’s a good idea to lightly lubricate the screwdriver shaft to reduce friction during the screw removal.
Remove the buttstock retaining screw. This 590 used a 1/2-inch hex head bolt to secure the buttstock to the receiver.
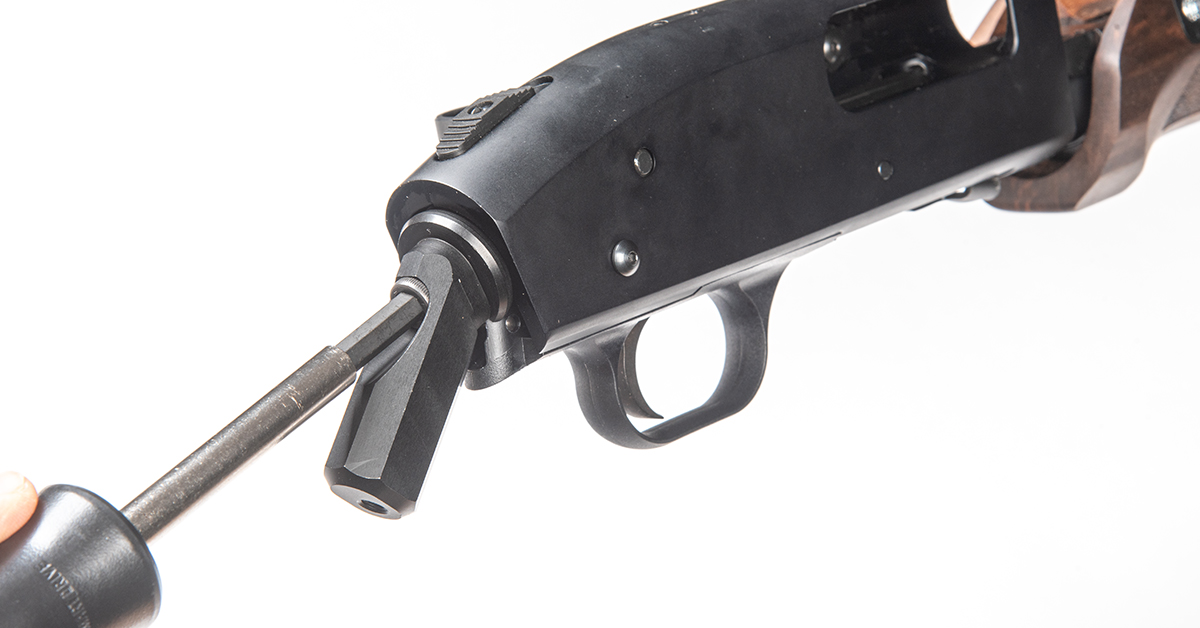
Install the Gladiatore adapter to the back of the receiver with a 1/4-inch Allen bit.
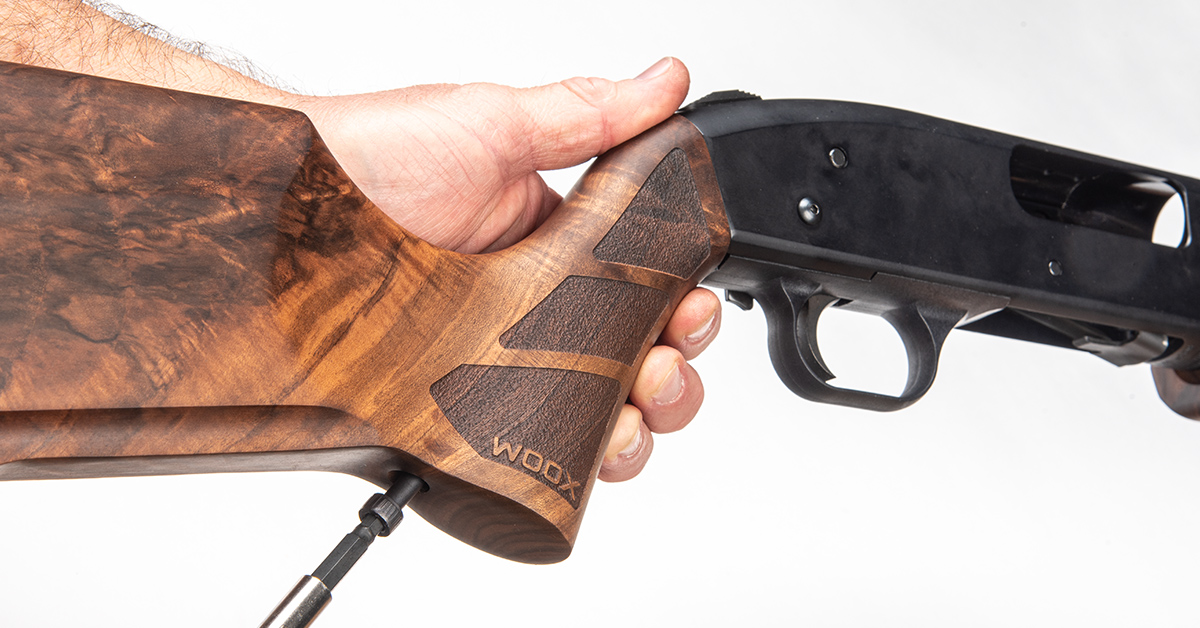
Insert the buttstock onto the adapter and secure with the supplied 5mm hex bolt. This completes the Gladiatore furniture installation.
The Vortex Viper Shotgun Enclosed Micro Red Dot was the perfect complement for this defensive shotgun upgrade.
Assessment
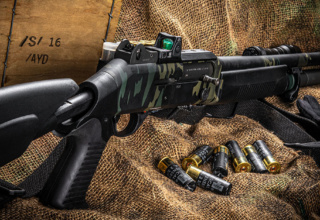
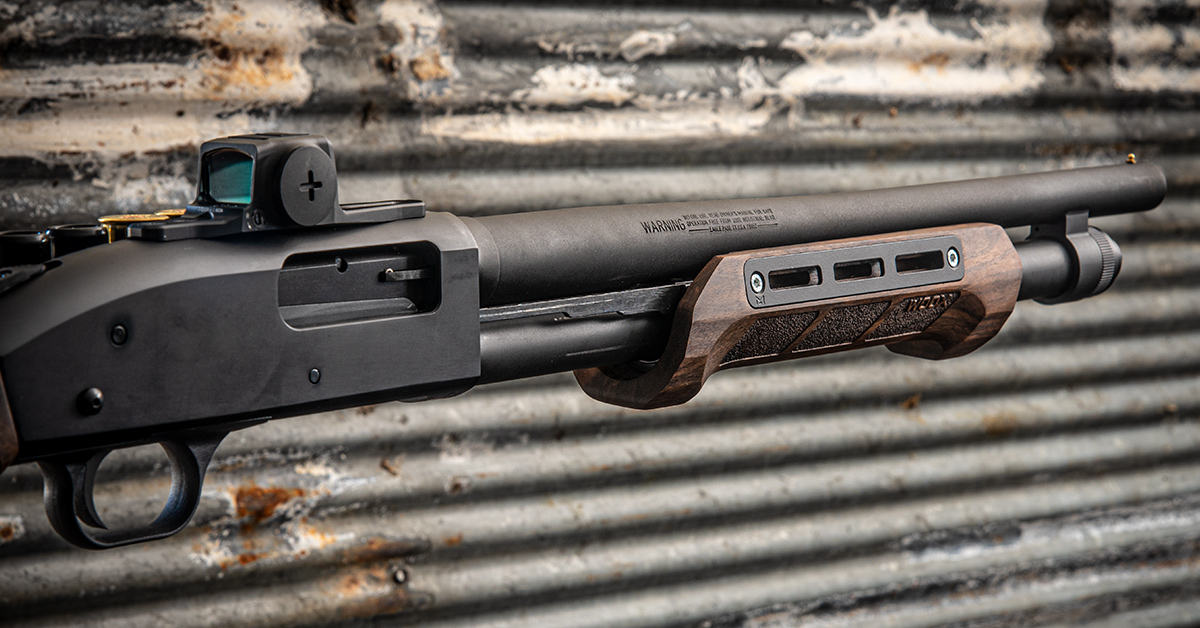
As you can see, the Woox Gladiatore furniture changed the nature of this 590 quite dramatically. The top shelf American walnut exhibits the fine craftsmanship you would expect from a high-end — dare we say, bespoke? — shotgun of Italian heritage.

The woodgrain shows brilliantly through the hand-rubbed satin finish, allowing highlights of the wood’s character to really stand out. The overall profile blends a classical wood stock presentation with modern firearm style. Fitment is spot-on, with no gaps or looseness between the stock and receiver.
That same classical-meets-modern design carries forward to the forend treatment, combining traditional aesthetics with contemporary function. Generous stippling along the forend and grip deliver real function, especially when compared to the slick polymer of the factory furniture. Even the relief cut for the M-LOK makes for a perfectly smooth, flush grip surface.
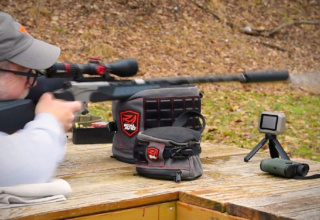
The functional enhancements really stood out on the range. The forend, with its recessed grip, gives the support hand a firm, no-slip hold for fast cycling. But it is the buttstock design that, for me, stole the show.

The grip is more angular than that of the factory stock, and it is longer. This makes for more ergonomic hand placement and a comfortable trigger reach. It also means you can pull the gun in tighter to the shoulder without the firing hand slipping. Overall, it makes for a stronger, more positive grip — something you want when firing high-velocity buckshot loads or heavy slugs.
The grip angle and steep wrist drop proved to solve a problem I sometimes have with the standard 500/590 stock, which is slamming my thumb into my nose under recoil. That, combined with the Monte Carlo profile, which brings my cheek weld up to a more comfortable position, eliminated the snout-smashing issue while maintaining good eye alignment down the barrel. Win and win.
Up front, the forend design significantly enhances weapon retention and slide operation. The front and rear buttressing gives the shooter something to push and pull against, depending on your reach. That contributes to a more positive hold, faster manipulation, and more confident cycling.
The Woox Gladiatore is a no-brainer if you want to improve the looks and function of your factory Mossberg 500 or 590 field shotgun. I, at first, questioned its viability on a defensive platform simply on the prejudice that fancy wood furniture didn’t have a place on a fighting shotgun. Well, I was wrong about that, as the ergonomic and operational improvements alone were worth the price of admission.
Whether you want to revamp your field shotgun with a fresh, classically-styled look or are angling for improved operational performance and a slight increase in heft to mitigate recoil in your defensive gun, the Woox Gladiatore kit will definitely set you on the right path.